3 Jobs That You Can Do at Home
DIY, or do it yourself, can be a popular pastime. One, it can be enjoyable and satisfying to have repaired or improved something yourself, and two, it can save money in relation to the household budget. So, we shall consider 3 types of jobs that it is possible for you to tackle yourself at home, no matter what your experience or usual occupation. However, if something large in your home is damaged, you could risk damaging it further if you try and fix it yourself. Check your home warranty first to see if you are covered to have it fixed. If you do not have a plan in place, there is more info over at homewarranty.firstam.com that you can browse in regards to this.
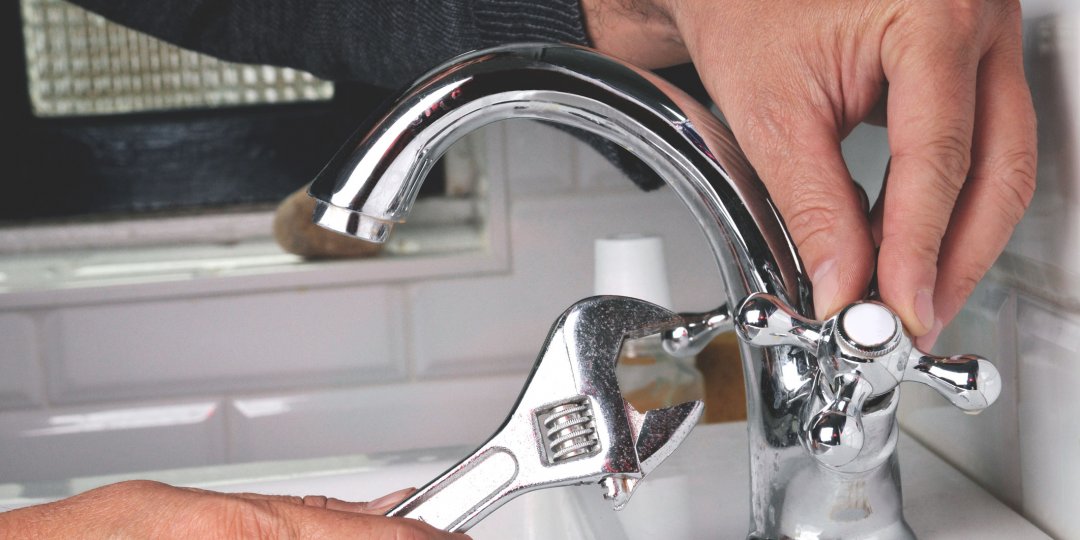
Leaking Tap
A dripping tap can be annoying but one of the simplest things around the home to fix. Usually, it is just a matter of replacing a washer. That is the internal rubber seal inside the tap’s mechanism. It can generally be found hiding under a tap’s decorative cap. Okay, not just decorative, it also indicates whether the water coming out of it will be hot or cold. Some caps can be unscrewed by hand, whereas others will require a slot-headed screwdriver to shift them. An adjustable spanner may in some cases be required. In that case, it may require a little strength. Then, once you are in, you will see the washer that needs to be replaced. These rubber rings can be purchased from all DIY stores, in packets that contain several, so that you have a spare one for the next time the job needs doing. So, that saved calling a plumber out. They all have call-out charges before any work is even completed. Oh, and I should have mentioned, you will need to turn off the water first before attempting the job unless you want to potentially flood your kitchen or bathroom. This is located under the sink and achieved with the help of a spanner. So, always keep a spanner on hand.
Blocked Drain
Okay, it is a slightly dirty job, but plastic or more heavy-duty waterproof gloves from unigloves.co.uk can be worn in the interest of hygiene. You surely would not want to be a victim of skin rashes, worse boils, post your cleaning session. Prevention is always better than cure. I think most of us would agree with this, especially those who would like to take up the work of draining cleaning themselves.
Honestly, I wouldn’t blame the more squirmish of you going to a site like https://www.apolloplumbing.net/services/drain-cleaning/
and hiring a plumber so you can keep your hands clean! For those who don’t mind getting a bit yucky, here’s what you have to do: You first need to pull the drain cover off. It may not be all that loose and could again require a flat-headed or similar screwdriver to remove it. If it is still stuck, a rope can be tied around the cover and pulled for extra leverage.
With the drain cover off it will be a case of finding the blockage with your hands. Feeling with your hands because the water may be too discolored to be translucent enough for you to see what is going on. In any case, it is likely to be deeper down where the problem is. Then remove by hand any material that you can see, or reach, that is potentially blocking the drain. It could simply be leaves. Next, a drain rod, which is purchasable from most DIY stores, can be used to assist in fully unblocking the drain before returning its cover.
The best quality draining rods available are poly drain rods which are made from polypropylene and have brass universal joints. You do, however, also have the choice of lockfast or universal joints, which the DIY store can advise you on. Simply put, universal joints should only be rotated in a clockwise direction, whereas lockfast is capable of rotations in either direction. Lockfast is therefore good for all situations and conditions. Of course, for bigger drains that are more blocked, it might be better to consider contacting a company like Elite Plumbing & Hydrojetting – Los Angeles to see if they could use more advanced techniques to remove any blockages from the drains.
Wallpapering
As with lots of things, preparing the wall first is necessary to achieve a smooth finish. If you have the time, remove all traces of any previous wallpaper, and use filler to sort out any holes. Bumpy areas can be sanded. A rough grade of sandpaper may avoid using tools to achieve the same result. A long decorating table is useful to lay out the strips of wallpaper and avoid creasing them prior to applying them to the wall. Wallpaper paste is available to adhere to the surface. Once stuck, you should smooth over the wallpaper to remove any air bubbles and then trim with a knife once dry to make neat edges. If you are new to this, maybe avoid wallpaper that has a pattern that might be difficult to match, or line up, as you apply the strips from ceiling to floor in your mission to decorate the whole room.
An alternative to wallpapering, if it is just not for you, would be to refresh the look of your walls by painting them. This can be over existing wallpaper. This offers a greater variety of colors but not necessarily different patterns and textures. Although, woodgrain finishes, and other paint effects, are available. For all of this sort of equipment, people may need to visit Home Depot if they don’t already have the equipment at home. When checking out online, people can even use https://www.raise.com/coupons/home-depot to check for any discounts or promo codes that may make these tools cheaper. Hopefully, people will be able to do a great DIY job with these tools.